- What a flat lay is
- Flat lay is not useful for every food
- The magic behind flat lay shots
- Handling the technical side of flat lay photography
- Cheat mode vs. camera rigging
- Put your cam on a rig or a tripod for flat lays
- Setting the right focus for a flat lay shot
- Go for a high f-stop when shooting flat lays
- Flat lay shots are related to still-life photography
- How to avoid basic mistakes in flat lay photography
- Conclusion
What a flat lay is
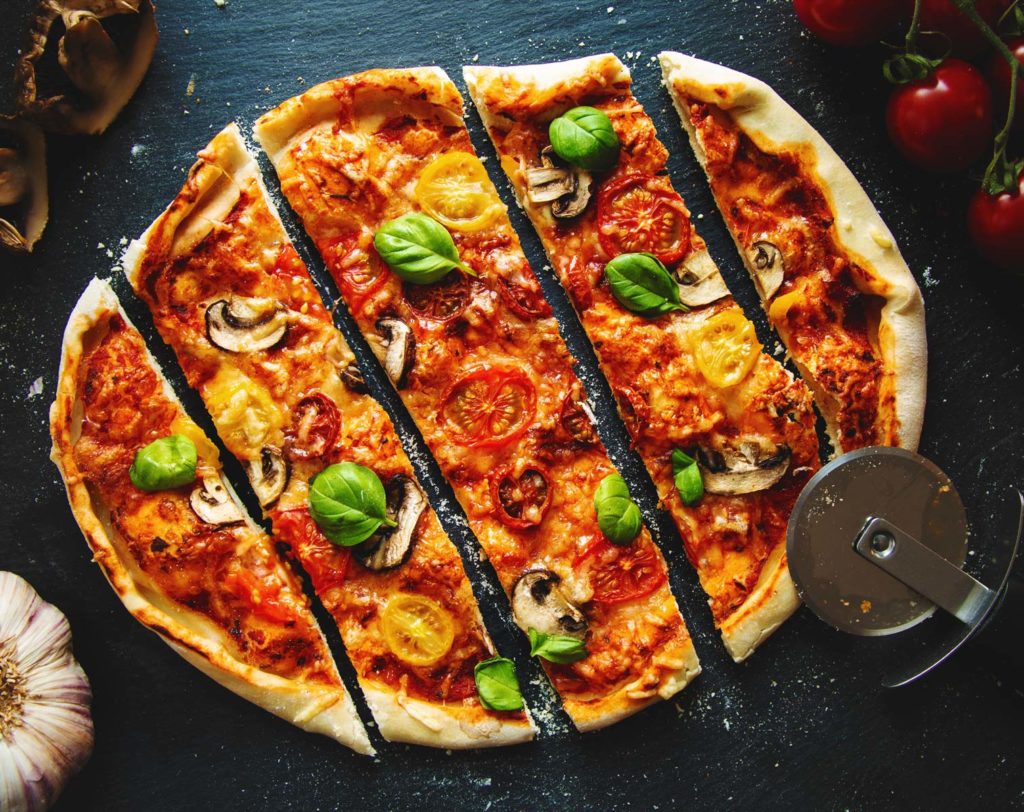
A flat lay, also known as a top shot, is a picture taken at an angle of 90 degrees to the subject. This top view, similar to a bird’s eye view, creates an overview shot of several things, whose arrangement usually follows different photographic composition principles. The flat lay is one of the 3 most common shot sizes in food photography.
Flat lay is not useful for every food
One word beforehand. The flat lay isn’t useful for every food. Think of a burger from above? Making no sense or? Every food where the details are more mentionable from the side isn’t useful for the flat lay shot. For everything else, it can be stunning!
Flat lay shots create an order or pattern of the things shown.
I call it “the God mode”. It’s the view from above. In a perfect world, 100% perfect leveled above your dish at a 90-degree angle. That’s the flat lay.
I’ve seen even big names doing it handheld, but I prefer getting it done with a tripod. It has to have the possibility to get an angle of 90 degrees. But most tripods will give you that option. Otherwise, get rid of it as fast as you can and build yourself a rig instead.
The magic behind flat lay shots
Flat lay shots are possibly the most famous shots in food photography. Instagram is filled with thousands and thousands of them.
There is one good reason why flat lay shots work so well in food photography.
Flat lay shots create an order or pattern of the things shown. It’s giving us a perfect overview of a scene which makes it very easy and fast readable for our brains.
Flat lay shots are a very graphical approach to food photography. It’s also related to still-life photography.
In knowing that, we can easily use some compositional techniques and strategies to guide the viewer’s eyes through the image. But how to get a typical flat lay shot done?
Handling the technical side of flat lay photography
Setting up a flat lay shot is quite easy, but it has to be done with precision. Otherwise, you probably will end up with perspective distortions in your final images.
First to mention is that you need to put your cam high above your food. For that get yourself a small bubble level to level your tripod.
Cheat mode vs. camera rigging
There are two ways of doing it. The “cheat mode” is to put your foot down to the floor and shoot it from a normal viewpoint. You may ask why to do so. The answer is that most of the tripods with the possibility to have a 90-degree extension arm are not high enough to get them in the right spot over your table.
Remember depending on your chosen lens you need some minimum focal distance between your food and your lens as well. Usually, most of the tripods I know are not high enough to get a good flat lay position.
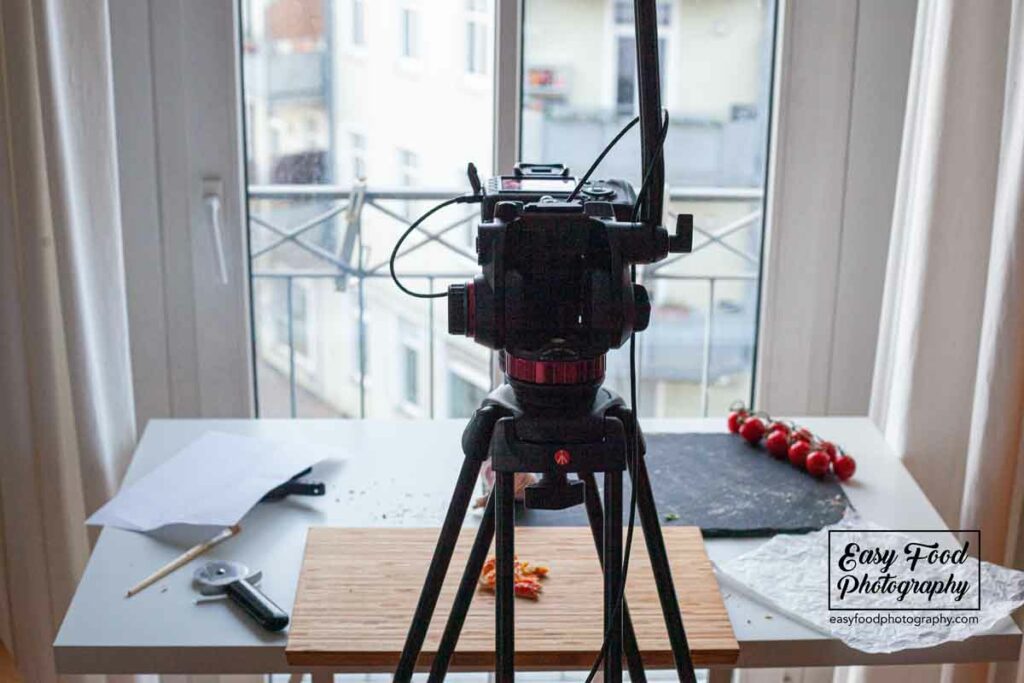
Put your cam on a rig or a tripod for flat lays
The second and more controllable way of doing it is to put your camera on a rig above your table where you put your food. Therefore you should shoot tethered because by using this method it’s nearly impossible to have a look through your viewfinder when the camera is mounted above your table.
So the use of a tethered solution is more practical. But anyways – I always recommend shooting tethered so or so for food photography. If you’d like to learn more about this, I recommend reading the article “Why shooting tethered will improve your food photography”.
When I first started with food photography I used a tripod with a 90-degree extension arm, but as described above this can be very limiting and getting pain. I started to think about an easy but effective way of doing flat lays so I came up with the idea to use the stuff I already have at the location.
Flat lay shots giving us a perfect overview of the scene which makes it very easy and fast readable for our brains to understand what’s going on.
After testing a lot of expensive solutions with extension arms, tripods, other fancy photography gear, etc, I ended up with the most simple and cost-effective solution.
I take two standard light stands put two super clamps on it, put a cheap IKEA curtain pole for just a few bucks between the clamps (because it’s very thick and strong), and use a third super clamp to get the camera in the right position by using a 1/4 inch spigot.
That setup costs less than 100 bucks which is really cheap in the photography world. And because I always bring light stands to a shoot I don’t have to bring extra stuff with me which makes this setup so handy.
And the good thing is that depending on which lens I use I can easily vary the height of the rig in no time. One thing to do is to level the rig once it’s set up. For that, I always have a small bubble level in my toolbox. With it, you can level the rig in under a minute.
You see it doesn’t have to be complicated. In my experience, the best solutions are always the simple ones.
Setting the right focus for a flat lay shot
Now that you put your camera right above your food there is one thing to do to make it perfect. When shooting flat lays you usually want to have everything on the table in focus because you confine your image to be only two-dimensional meaning you lose the ability to show depth.
Go for a high f-stop when shooting flat lays
As a basic rule, you should always focus on your food, but this can sometimes be a little bit hard to decide because depending on the height of different objects in your scene you are getting really fast focus issues. I often end up with a nearly closed aperture at f-stops between f8 and above to get everything in focus.
The most common mistake when it comes to flat lay shots is a focal perspective distortion caused by an unleveled camera.
Flat lay shots are related to still-life photography
One thing you should really take care of is the details in a flat lay. Watch for diagonal lines etc. Don’t get the eyes distracted. Create your composition wisely. Good results need time! Because you usually see a lot of different things in a flat lay shot try to structure your image for the eye of the beholder.
Some basic understanding of photographic compositional principles and theories are helping you to not distract the viewer’s eyes.
You should be familiar with the rules of thirds, how to use negative space, the rule of odds, the principle of leading lines, etc.
Try to balance your shot and not overload your composition. Reduce your props and your composition to the core. Experiment with different techniques to find out what your personal preferred style is. There is no wrong or right. Oust you doing your thing.
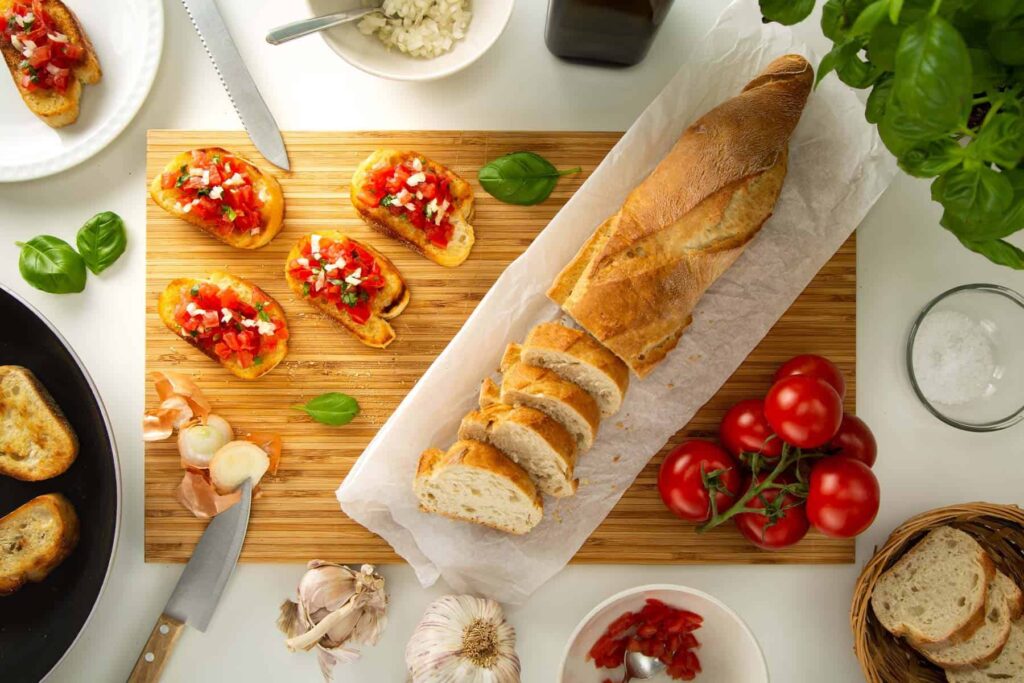
A few simple tips can help you to get things right:
- As humans, we are used to focussing on the brightest point in an image to make your food the brightest point.
- We are used to focussing on the biggest structure in an image as well. So put your food on the biggest plate in the frame.
- In the western hemisphere, we are used to reading images and texts from left to right. You can use this information to structure your shot as well.
- You can also use props like wooden cutting boards or cutlery to bounce the eye back into the frame towards your main subject.
How to avoid basic mistakes in flat lay photography
The most common mistake when it comes to flat lay shots is a focal perspective distortion caused by an unleveled camera.
If your cam isn’t attached at a perfect 90-degree angle depending on your lens you will see more or less focal distortion in your frame. Mostly this looks not really good at all kinds of plates, glasses, bowls, and bottles.
7 useful p
- Get your tripod over your dish at a 90-degree angle to normal mode and try to level it 100% perfect.
- Try to shoot tethered if possible. This will allow you to check your image on your computer screen and makes the whole workflow and process easier. Another advantage of shooting tethered is that you can easily shoot different exposures or images and comp them easily together in Photoshop CC (or alternative freely in Gimp or Darktable).
Canon shooter can use Digital Photo Professional. It’s free software from Canon for download. It even allows you to execute every shot remotely from your computer. Sony has a free software called Imaging Edge which is a tethering tool, too. Nikon has free software called Camera Control Pro. Just be aware that your cam model is supported. I’m sure other brands offer similar software with their cams. Just do a quick google search on that. It’s completely worth it – not only for flat lay shots! - Check that your tripod stand really steady. Otherwise use a sandbag (or a heavy bag) on it to make it steady.
- Think of what you want to overview: only a detail of the dish or more or less a bigger scene.
- Put your food into the scene and find the right position. After that build up your scene step by step by throwing in the remaining props.
- A good flat lay shot takes time. So stop being hasty!
- Please remember to set your white balance right to let your food look appetizing.
Conclusion
Flat lay shots are very popular and not hard to technically execute. You just need a basic understanding of photographic principles and a perfect 90-degree angle to your food. You can put your food on the ground or build yourself an easy rig out of some super clamps and two light stands. Always use a level to check the perfect balance of your cam. Otherwise, you will see some focal distortion in your shot.
Try to not overload your composition and think about principles such as leading lines negative space etc. to guide your viewer’s eyes through your shot. Flay lay shots are a good way to implement some story to your food images. The flat lay angle is also good to show the different steps in food preparation.
If you found this article useful in any way, I would be happy if you share it with those interested. If you have any questions or need feedback for your photos, feel free to join the forum for free and discuss with our community.
Cheers,

CREATING UBER-AWESOME FLAT LAY FOOD PHOTOGRAPHY IN NO TIME was written by EasyFoodPhotography founder and editor Alex Fuchs. Alex loves photography and good heavy stoner rock music. His food styling skills are restricted, but he is working on that. When people approach him saying “You can’t do that” his maxim is always: I’ll do it in a minute. He loves to be challenged. Follow his Instagram feed. You read “Creating uber-awesome flat lay food photography in no time”.

THIS STORYTELLING TECHNIQUE WILL CHANGE YOUR FOOD PHOTOGRAPHY FOREVER
HOW TO START FOOD PHOTOGRAPHY

10 WAYS TO GET BACKDROPS FOR FOOD PHOTOGRAPHY IN 2022
FOOD STYLING BASICS

HOW TO TURN ANY LENS INTO A MACRO LENS FOR FOOD PHOTOGRAPHY
WHY SHOOTING TETHERED WILL IMPROVE YOUR FOOD PHOTOGRAPHY
HOW TO USE A SNOOT FOR FOOD PHOTOGRAPHY
PLANNING & PREPPING YOUR FOOD GIG LIKE A PRO
THE CHALLENGES OF BECOMING A FOOD PHOTOGRAPHER
33 MUST-HAVES FOR FOOD PHOTOGRAPHY IN 2022 THAT COST NEARLY NOTHING
HOW TO START FLASH FOOD PHOTOGRAPHY

15 THINGS YOU CAN DO TODAY WHICH WILL CHANGE YOUR FOOD PHOTOGRAPHY FOREVER

HOW TO ACCESS 10K PROPS FOR FREE

15 HACKS WHICH CHANGE YOUR INSTA FOREVER